Simple Home Repairs Every Beginner Can Master
This resource covers essential skills like fixing leaky faucets, patching small holes in drywall and stopping a running toilet. It also includes easy techniques for replacing light fixtures, silencing squeaky doors and any painting touch-ups. With step-by-step instructions, minimal tools, and beginner-friendly tips, this guide empowers anyone to save money and keep their home in top shape without calling a professional.
3/20/20258 min read

Homeownership often comes with its share of minor issues that can seem daunting for those new to DIY tasks. Simple repairs like fixing leaky faucets or patching drywall can be mastered with a bit of guidance. Learning these basic skills empowers individuals to tackle common household problems confidently and save money on professional help.
For beginners, the key to success lies in understanding the tools and techniques required for each task. Familiarity with essential tools such as wrenches, screwdrivers, and pliers can make the process manageable. They will find that taking small steps can lead to significant results, fostering a sense of accomplishment.
Mastering these repairs not only improves a home but also enhances a person's confidence in handling household maintenance. With the right approach, anyone can transform their living space and develop practical skills that last a lifetime.
Understanding Home Repair Safety
Home repair tasks come with inherent risks, making safety a top priority. Proper precautions can prevent injuries and ensure a successful repair experience. Knowing what to wear, how to assess risk, and how to handle tools correctly is essential.
Personal Protective Equipment
Wearing the right personal protective equipment (PPE) significantly reduces the risk of injury. Key items include:
Safety Glasses: Protect the eyes from debris and dust.
Gloves: Offer hand protection from sharp objects and chemicals.
Dust Masks: Shield respiratory systems from inhaling harmful particles.
Hearing Protection: Reduce noise exposure when using loud tools.
Using PPE consistently creates a safer work environment. Ensuring that gear fits properly maximizes protection and comfort. Most importantly, never skip wearing PPE, even for small tasks.
Identifying and Mitigating Hazards
Before starting any project, it's crucial to identify potential hazards. This includes assessing workspaces for:
Electrical Risks: Check for exposed wires or outlets.
Slips and Trips: Keep floors clear of tools and materials.
Chemical Exposure: Be aware of any substances that could pose health risks.
To mitigate these hazards, maintain a clean workspace and use proper storage methods. Ensure adequate ventilation when working with chemicals. Additionally, understanding how to turn off electrical power to affected areas can prevent accidents.
Tools and Materials Basics
Having the right tools and materials is essential for anyone aiming to tackle home repairs. Knowing how to effectively use these tools can dramatically simplify the process and enhance results.
Essential Tools for Beginners
Hammer: A claw hammer is versatile for driving nails and removing them. It's an essential tool for hanging pictures or assembling furniture.
Screwdriver Set: A basic set should include both flathead and Phillips screwdrivers. They are needed for assembling or disassembling various items around the house.
Tape Measure: Accurate measurements are vital. A 25-foot tape measure is suitable for most home projects.
Pliers: Slip-joint pliers and needle-nose pliers can grip, twist, and cut wire or tighten hardware.
Utility Knife: Useful for cutting various materials, such as cardboard and rope. A good utility knife with replaceable blades is practical.
Level: Ensures items like shelves are straight. A torpedo level is handy for smaller projects.
These tools form a solid foundation for any beginner looking to tackle home repairs.
Common Materials and Supplies
Duct Tape: Known for its strength and versatility, duct tape can temporarily fix leaks and secure loose items.
Wood Glue: Perfect for repairing wood furniture. It creates strong bonds and is often used for craft projects.
Nails and Screws: Always have a selection on hand. Different lengths and types accommodate various projects.
Sandpaper: Graded in different levels of coarseness, sandpaper is essential for smoothing surfaces before painting.
Paint and Primer: For surface touch-ups or complete redecoration, having a few basic colors can significantly improve a room’s appearance.
Caulking or Sealant: Useful for sealing gaps in windows, doors, or sinks, preventing drafts and water leaks.
Keeping these materials accessible ensures smooth project execution.
Basic Plumbing Fixes
Plumbing issues can arise at any time, and knowing how to handle them is essential for homeowners. Basic fixes like unclogging drains, repairing leaky faucets, and troubleshooting toilets are manageable tasks that can save money and prevent larger problems.
Fixing Leaky Faucets
Leaky faucets waste water and can raise bills. Repairing them typically involves replacing worn-out washers or O-rings.
Turn Off Water Supply: Locate the shut-off valves under the sink and turn them clockwise.
Remove Faucet Handle: Use a screwdriver to remove any screws and lift off the handle.
Inspect the parts for damage. Replacing a washer is often as simple as unscrewing the faucet and inserting a new one. Reassemble all components and check for leaks.
Helpful Tip: Use a sink plug to prevent screws or small parts from falling down the drain.
Tools and Supplies: Screwdrivers, sink plug, washer/O-ring kit, gloves and safety glasses.
Toilet Troubleshooting
Toilets may leak or fail to flush properly. Quick diagnostics can often resolve these issues.
Running Toilet: If the toilet runs continuously, check the flapper valve for wear. To replace;
Shut off the water supply behind the toilet and flush toilet to drain the tank
Unhook chain from the flush lever
Disconnect flapper from the overflow tube
Connect the new flapper to the overflow tube and the chain to the flush lever, leaving a little slack.
Turn the supply water on and ensure the flapper seals properly after each flush, adjust chain length if needed.
Weak Flushing: A weak flush can be caused by a clogged trap. Use a toilet snake auger to clear it.
For any persistent problems, inspecting the fill valve may also be necessary. Ensure it’s functioning correctly to maintain proper water levels in the tank.
Tools and Supplies: Toilet snake auger, flapper valve, gloves and safety glasses.
Electrical Safety and Simple Repairs
Understanding basic electrical safety is crucial for anyone attempting home repairs. Simple tasks like resetting circuit breakers, replacing light switches, and changing light fixtures can be done safely with the right knowledge and precautions.
Resetting Circuit Breakers
When a circuit breaker trips, it disrupts the electric flow to prevent overheating. To reset it, first locate the breaker panel, which is typically in a basement, garage, or utility room.
Identify the Tripped Breaker: A tripped breaker will often be in the "off" position or in between "on" and "off."
Turn It Off: Firmly switch it to the "off" position.
Turn It Back On: Flip it back to the "on" position.
Always wear rubber-soled shoes and avoid standing in water during this process.
Replacing Light Switches
Replacing a light switch can enhance functionality and improve safety.
BEGIN BY TURNING OFF THE POWER AT THE CIRCUIT BREAKER BEFORE STARTING.
Remove the Switch Cover Plate: Unscrew the cover and set it aside.
Take Out the Old Switch: Remove screws securing the switch to the electrical box.
Connect the Wires: Carefully disconnect and reattach wires to the new switch. Ensure the ground wire connects to the green screw.
Make sure all connections are snug and replace the cover plate when finished.
Helpful Tip: Once complete, wrap the switch in electrical tape to add an extra layer of protection against accidental contact with live terminals.
Tools and Supplies: Screwdrivers, electrical tape, electrical switch and cover, gloves and safety glasses.
Changing Light Fixtures
Upgrading light fixtures can refresh a room's look.
BEGIN BY TURNING OFF THE POWER AT THE CIRCUIT BREAKER BEFORE STARTING.
Remove the Old Fixture: Unscrew the current fixture and gently lower it to access the wiring.
Disconnect Wires: Take note of how the wires are connected. Disconnect the wires by untwisting wire nuts.
Install the New Fixture: Connect the new fixture using the same color-coded wires. Secure it per the manufacturer's instructions.
Always ensure that the fixture is firmly attached and free of exposed wires to prevent electrical shocks.
Helpful Tip: Once wires are connected with wire nuts, wrap electrical tape around wire nut and wire to add an extra layer of securement.
Tools and Supplies: Screwdrivers, wire nuts, electrical tape, light fixture, gloves and safety glasses.
Wall and Room Repairs
Homeowners often face issues with walls and floors requiring repair. Addressing these concerns can enhance the aesthetics and functionality of a space, making essential repairs manageable for beginners.
Patching Drywall
Patching drywall is a straightforward process ideal for filling small holes or dents.
Prepare the Area: Clean the hole and surrounding area.
Apply the Patch: For small holes, use a pre-made patch. Larger holes may need a piece of drywall cut to fit.
Add Joint Compound: Spread joint compound over the patch using the putty knife, feathering it out to blend with the surrounding wall.
Sand and Paint: Once dry, sand the area smooth and paint to match the wall color.
This technique allows one to restore the wall’s appearance effectively.
Helpful Tip: Prime the patch before painting to avoid discoloration.
Tools and Supplies: Putty knives, utility knife, orbital sander, paint brush/roller, drywall patch/board, joint compound, sandpaper, drop clothes/plastic, paint trays, painters tape, paint and primer, dust mask, gloves and safety glasses.
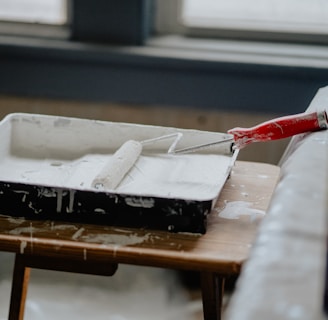
Painting and Touch-up Techniques
Touching up paint is essential for maintaining a fresh look. Proper techniques ensure a seamless blend with existing paint.
Choose the Right Paint: Match the paint type and finish to the original area.
Prepare the Surface: Clean the area and lightly sand any rough edges.
Use a Small Brush: A small brush or roller will help apply paint accurately.
Thin Layers: Apply thin coats, allowing each to dry fully before adding another layer.
This approach prevents visible brush strokes and maintains a uniform appearance.
Helpful Tip: Feather the edges to blend the fresh paint outward to avoid harsh lines.
Tools and Supplies: Paint brush/roller, sander, roller covers, paint trays, painters tape, drop cloth/plastic, color match paint, dust mask, gloves and safety glasses.
Fixing Squeaky Doors
Squeaky doors can be annoying. Addressing this issue typically starts by locating the source of the noise.
Identify the Squeak: Slowly open and close the door to identify where the squeak is coming from (most likely the hinges).
Add Lubrication: Use a lubricate such as WD-40 or a 3 in 1 oil and apply it directly on the hinge pins and any pivot points.
Replace Hinge: If squeaking persists, check to make sure the hinge is secured by tightening or replacing hinge screws. Replace old or worn-out hinges.
These steps can help reduce or eliminate the annoying squeaking.
Tools and Supplies: Screwdrivers, impact/drill driver, hammer, hinge pin removal tool, lubricate, replacement hinges and screws, ear protection, gloves and safety glasses.
Outdoor Maintenance
Outdoor maintenance is essential for maintaining the aesthetic and structural integrity of a home. Basic tasks in this area include cleaning gutters, repairing decks, and performing landscaping fixes. Understanding these tasks can help prevent larger issues down the road.
Cleaning Gutters and Downspouts
Cleaning gutters and downspouts is crucial for preventing water damage. Debris in the gutters can lead to water pooling and overflow, which could damage the roof or foundation.
Steps:
Use a ladder to access the gutters safely.
Remove leaves and debris using your hands or a scoop.
Flush the gutters with water from the hose to remove smaller particles.
Check downspouts for blockages. If water fails to flow through them, consider using a plumbing snake or a high-pressure hose attachment to clear the obstruction.
Tools and Supplies: Ladder, leaf scoop, water hose, gloves and safety glasses.
Simple Deck Repairs
Deck maintenance helps ensure safety and longevity. Inspecting and repairing loose boards or railings can prevent accidents and costly repairs.
Identifying Issues: Look for splintered boards, loose nails, or soft spots.
Repair Steps:
For loose boards, use a drill and wood screws to secure them.
Replace splintered or rotting boards by removing the old ones and installing new, pressure-treated wood.
Consider sanding rough areas to prevent injuries.
Regularly applying deck sealant can also help protect the wood from weather-related damage.
Tools and Supplies: Impact/drill driver, orbital sander, hammer, pry bars, wood screws, pressure-treated deck boards, deck sealant, ear protection, gloves and safety glasses.
Basic Landscaping Fixes
Maintaining a neat landscape contributes to curb appeal and property value. Simple landscaping tasks can restore the health and appearance of gardens.
Weeding: Regularly pull weeds to prevent them from overtaking plants.
Mulching: Apply a layer of mulch to retain moisture and reduce weed growth.
Trimming: Prune shrubs and trees to promote healthy growth and improve aesthetics.
To maintain flower beds, ensure plants have adequate spacing for air circulation. Water plants early in the morning or late in the afternoon to prevent evaporation and ensure proper hydration.
Tools and Supplies: Weed spray, weed puller, mulch, pruner/shears, gloves and safety glasses.
Your go-to source for DIY tools and ideas.
© 2025. All rights reserved.